Halo + Schlagschatten-Workflow auf transparenter Silhouette
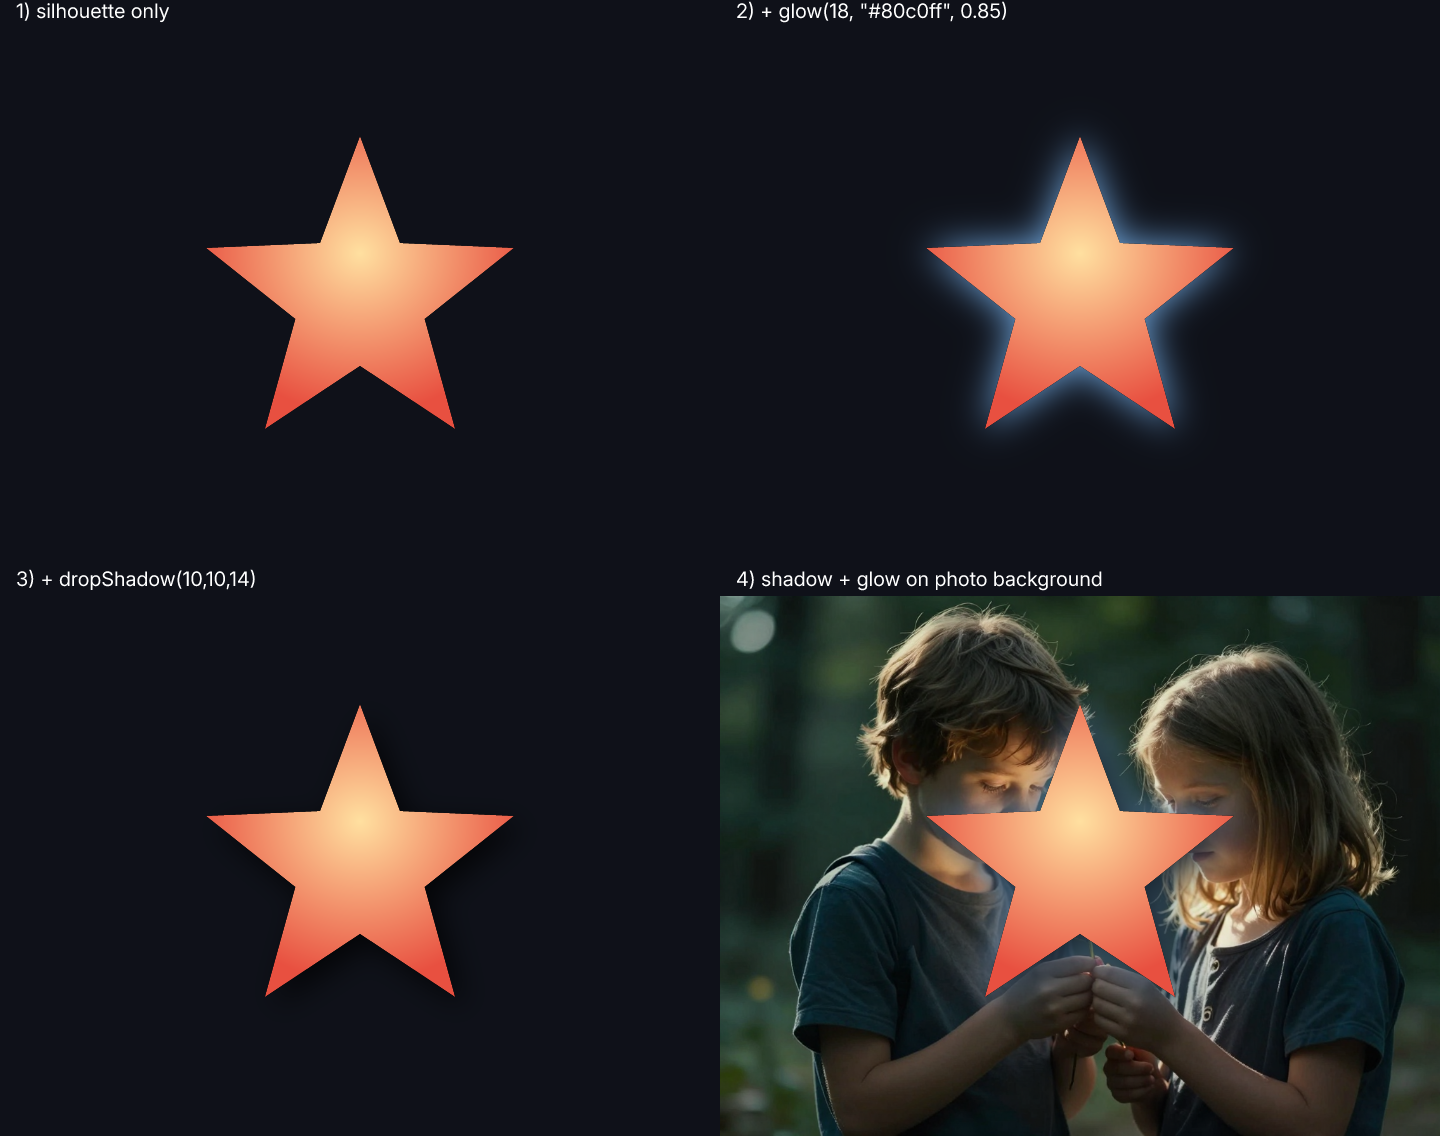
Setzt einen farbigen Halo und einen weichen Schlagschatten hinter jedes Motiv mit transparentem Hintergrund — der „polished Product Shot"-Look, auf den jedes Marketplace-Listing und E-Commerce-Hero-Bild setzt. Das Beispiel baut den Look in vier Panels auf, sodass jede Ebene sichtbar wird: Basis, nur Halo, Halo + Schatten, fertige Komposition auf echtem Foto-Hintergrund. Wählen Sie jede beliebige Halo-Farbe (`GLOW_COLOR`), justieren Sie Radius und Deckkraft, bestimmen Sie wie weit der Schatten fällt und wie weich er wird. Tipp: Wirkt am besten auf freigestellten Motiven (bereits transparent) — in Kombination mit dem `rmbg`-Tool zur Hintergrund-Entfernung wird jedes flache Foto zum platzierungsfertigen Asset.
INPUT

Halo + shadow build-up
JavaScript
// Step-by-step glow + dropShadow on a transparent silhouette,
// finishing with a "real product placement" composite onto a photo.
// demo_halo_shadow.js
//!INPUT: INPUT
//!OUTPUT: OUTPUT
//!PARAM: GLOW_BLUR:number=18,min=2,max=60
//!PARAM: GLOW_COLOR:string=#80c0ff
//!PARAM: GLOW_STRENGTH:number=0.85,min=0,max=1
//!PARAM: SHADOW_OFFSET:number=10,min=0,max=40
//!PARAM: SHADOW_BLUR:number=14,min=2,max=40
//!PARAM: SHADOW_STRENGTH:number=0.7,min=0,max=1
//!PARAM: MAX_W:integer=720,min=400,max=1600
//!PARAM: LABEL_SIZE:number=20,min=10,max=64

// `glow` and `dropShadow` work on alpha edges — both produce the
// classic "outer halo" / "drop shadow" only where the silhouette
// has transparency to extend into. This showcase builds up the
// effects one at a time so each one's contribution is obvious,
// and finishes with a real-world-style composite.
//
// 4-panel grid:
//   ┌──────────────────────────┬──────────────────────────┐
//   │ 1) subject only          │ 2) + glow (halo)         │
//   ├──────────────────────────┼──────────────────────────┤
//   │ 3) + dropShadow          │ 4) glow + shadow on the  │
//   │    (no glow)             │    photo background      │
//   └──────────────────────────┴──────────────────────────┘
//
// Subject is built inline via Engine.loadSVG() — no external
// tools required. Tweak GLOW_COLOR to retint the halo
// ("#ff80ff" magenta, "#ffe080" warm gold, …).

const SRC0 = Engine.loadImage(INPUT);
{
  const long = Math.max(SRC0.width, SRC0.height);
  if (long > MAX_W) {
    const s = MAX_W / long;
    SRC0.resize(Math.round(SRC0.width * s),
                Math.round(SRC0.height * s),
                Interp.Bilinear);
  }
}
const W = SRC0.width;
const H = SRC0.height;

// Stylised silhouette inline — 5-pointed star with a warm radial
// gradient. Demonstrates that loadSVG carries gradients through.
function makeStar() {
  const cx = W / 2, cy = H / 2;
  const rOuter = Math.min(W, H) * 0.30;
  const rInner = rOuter * 0.42;
  let pts = '';
  for (let i = 0; i < 10; i++) {
    const a = -Math.PI / 2 + i * Math.PI / 5;
    const r = (i % 2 === 0) ? rOuter : rInner;
    pts += `${(cx + Math.cos(a) * r).toFixed(1)},${(cy + Math.sin(a) * r).toFixed(1)} `;
  }
  return Engine.loadSVG(
    `<svg xmlns="http://www.w3.org/2000/svg"
          width="${W}" height="${H}" viewBox="0 0 ${W} ${H}">
      <defs>
        <radialGradient id="g" cx="50%" cy="40%" r="55%">
          <stop offset="0"  stop-color="#ffe0a0"/>
          <stop offset="1"  stop-color="#e85040"/>
        </radialGradient>
      </defs>
      <polygon fill="url(#g)" points="${pts.trim()}"/>
    </svg>`);
}

const subject = makeStar();

// ── Panel layout ────────────────────────────────────────────────
const bandH = LABEL_SIZE + 8;
const cellW = W;
const cellH = bandH + H;

const out = Engine.createImage(1, 1);
out.setPixel(px(0, 0), new Pixel(0.06, 0.07, 0.10, 1.0));
out.resize(cellW * 2, cellH * 2);

function panel(label, image, col, row) {
  const x0 = col * cellW;
  const y0 = row * cellH;
  out.drawText(label, x0 + 16, y0 + LABEL_SIZE - 2, {
    size: LABEL_SIZE, color: NamedColor.white,
  });
  out.blendAt(image, px(x0, y0 + bandH), 1.0, BlendMode.Over);
}

// (0, 0) ── bare subject — alpha edges visible against panel bg
panel('1) silhouette only', subject.clone(), 0, 0);

// (1, 0) ── + glow — halo OUTSIDE the silhouette
{
  const t = subject.clone();
  t.glow(GLOW_BLUR, GLOW_COLOR, GLOW_STRENGTH);
  panel(`2) + glow(${GLOW_BLUR}, "${GLOW_COLOR}", ${GLOW_STRENGTH})`, t, 1, 0);
  t.free();
}

// (0, 1) ── + dropShadow — soft offset silhouette behind
{
  const t = subject.clone();
  t.dropShadow(SHADOW_OFFSET, SHADOW_OFFSET, SHADOW_BLUR,
               '#000000', SHADOW_STRENGTH);
  panel(`3) + dropShadow(${SHADOW_OFFSET},${SHADOW_OFFSET},${SHADOW_BLUR})`, t, 0, 1);
  t.free();
}

// (1, 1) ── glow + dropShadow composited onto the photo background
//          → the practical "polished product placement" use case
{
  // Build the styled subject (shadow first, glow last so the halo
  // sits on top of the shadow rim).
  const styled = subject.clone();
  styled.dropShadow(SHADOW_OFFSET, SHADOW_OFFSET, SHADOW_BLUR,
                    '#000000', SHADOW_STRENGTH);
  styled.glow(GLOW_BLUR, GLOW_COLOR, GLOW_STRENGTH * 0.85);
  // Composite onto the photo
  const composite = SRC0.clone();
  composite.blendAt(styled, px(0, 0), 1.0, BlendMode.Over);
  panel('4) shadow + glow on photo background', composite, 1, 1);
  styled.free();
  composite.free();
}

SRC0.free();
subject.free();
out.save(OUTPUT);
out.free();

// © 2026 Michael Lechner · mlc OpticScript · https://mlcgo.eu · Elastic License 2.0