Quick Start
From download to your first connected server in about two minutes — and then the good parts: passwordless login, themes, monitoring, and Docker.
1. Install — 30 seconds
Not installed yet? The builds for every OS are on the product page — free, no account. Download and run: no installer needed, no dependencies, nothing to configure.
- Windows — run the installer (or the portable
.exe). It is not code-signed yet, so SmartScreen says Windows protected your PC — click More info → Run anyway. If that makes you uneasy: the Microsoft Store version is coming shortly; it is signed by Microsoft and installs without any warning. - macOS — open the
.dmg, drag MLC Terminal to Applications. It starts without a warning — the app is notarised by Apple. - Linux —
chmod +x mlcterm-linux && ./mlcterm-linux. On Fedora, RHEL or openSUSE there is a GPG-signed RPM instead.
On first launch: your personal key
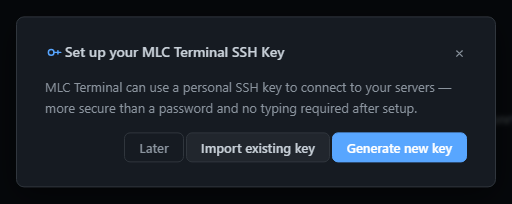
Before the interface appears, MLC Terminal offers to create a personal SSH key. Click Generate new key — it takes a second and is the foundation for passwordless login (step 4). Already have a key? Choose Import existing key; or click Later to skip — the dialog reappears on the next launch until a key exists.
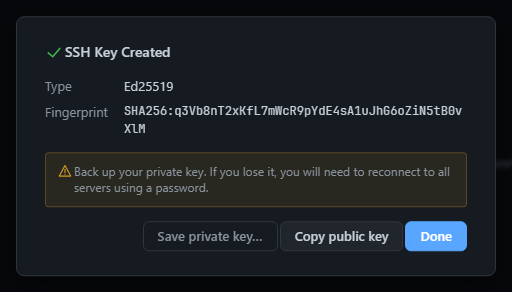
MLC Terminal then shows the new key's fingerprint. Important: use Save private key… to keep a backup copy — if you lose the key you'll have to log in with a password everywhere again. Then click Done.
Then you land on the empty interface — no connections yet, just the + New Connection button.
Everything unlocked for 30 days
A fresh installation runs with every feature for 30 days — no account, no registration. The days left are shown at the top right of the title bar and under Settings → Registration.
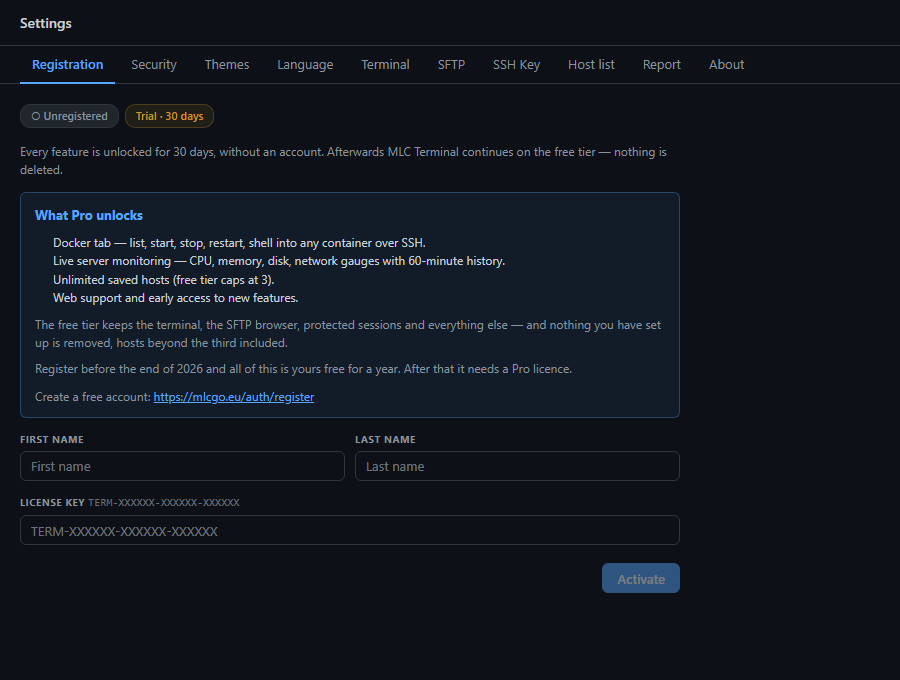
Afterwards MLC Terminal carries on in the free tier, and nothing is deleted. The terminal, the SFTP browser and protected sessions stay; the Docker tab and live monitoring then need a licence. In the free tier you can add up to three hosts — the ones you already have stay, beyond the third included.
2. Add your first server
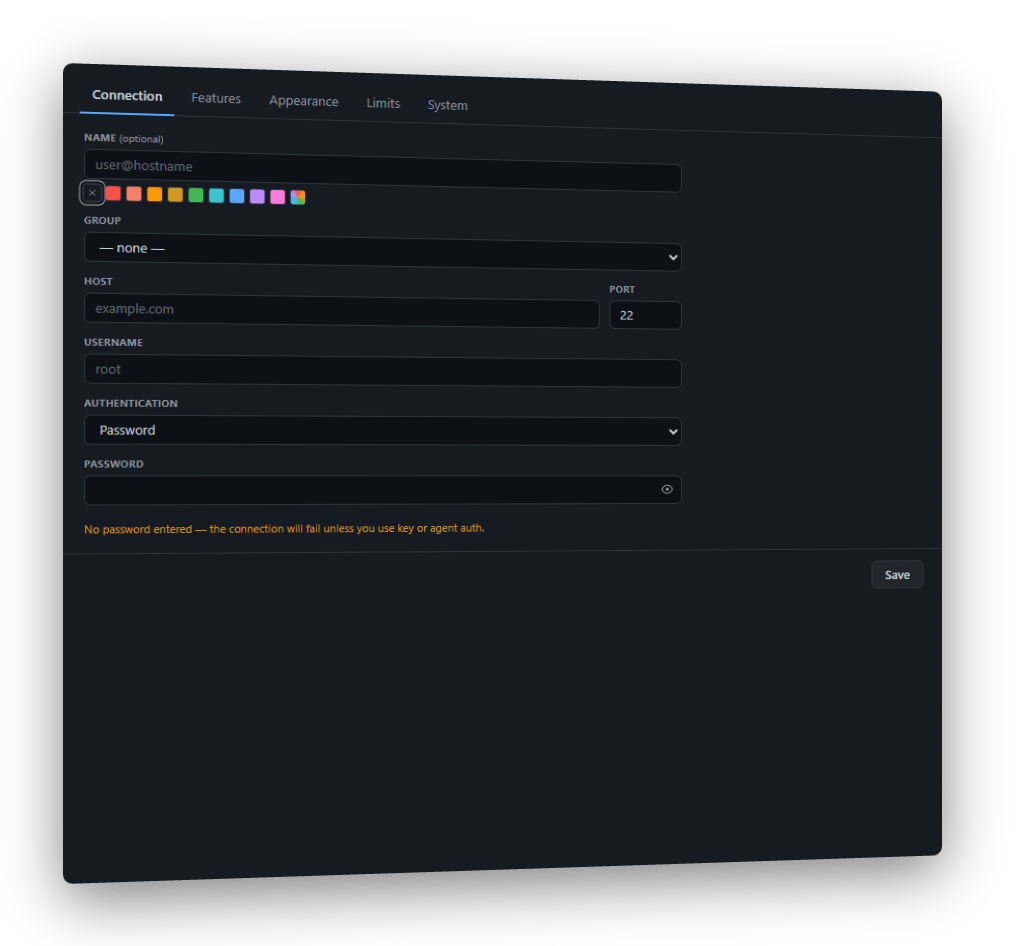
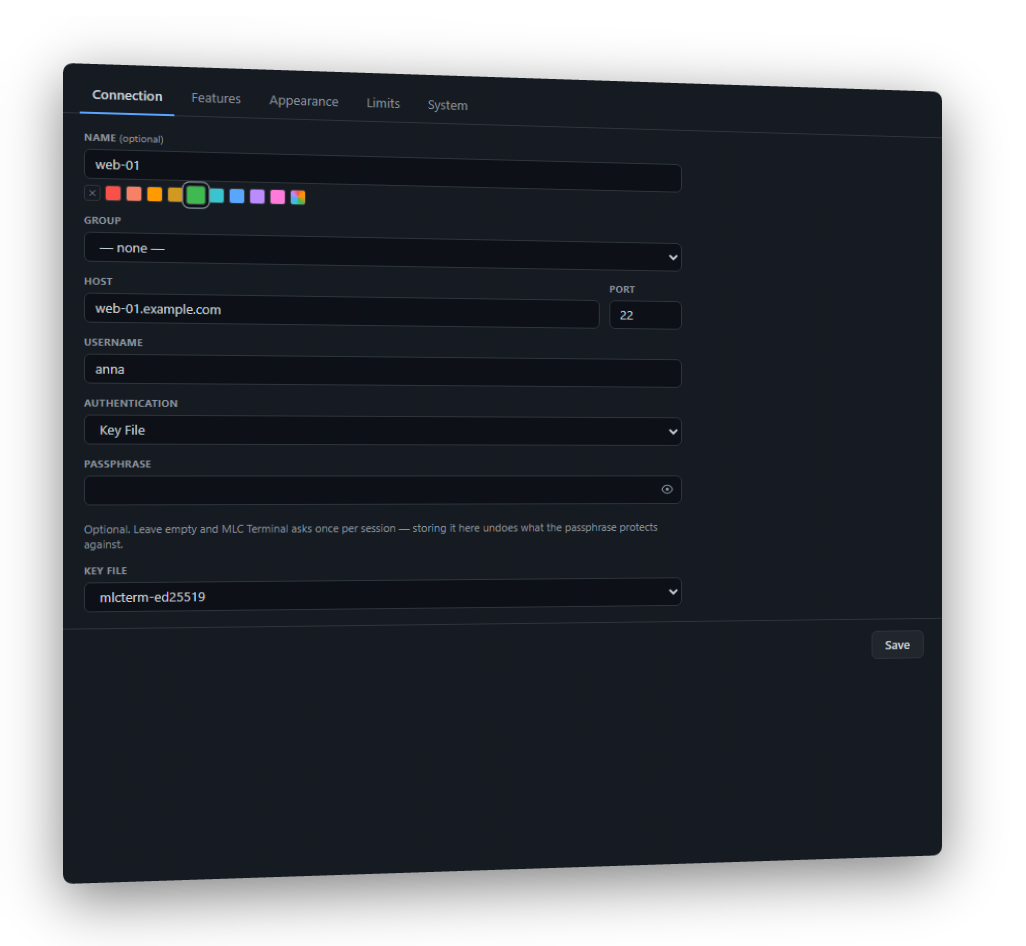
Click + New Connection in the sidebar and fill in the basics: a name, the host or IP, the port (22 by default), your username, and how to authenticate (password, SSH key, or agent).
Picking a key file? Leave the Passphrase field empty — MLC Terminal asks for one only if your key actually has one, and remembers the answer for as long as the app is open. The SSH Agent option checks your machine first: if no agent is running or it holds no keys, the option is greyed out and says why, rather than letting you pick something that cannot work.
What the remote machine needs
MLC Terminal connects over plain SSH, so the server just needs its SSH service running:
- Linux / Unix —
sshdis usually already running. If not:sudo systemctl enable --now ssh(orsshd). - macOS — System Settings → Sharing → Remote Login, switch it on. (The exact path changes between macOS versions.)
- Windows — easiest is to install WSL2 (
wsl --installin an admin PowerShell) and set up an SSH server inside it (sudo apt install openssh-server). Alternatively, Windows' built-in OpenSSH Server via Optional features.
There are plenty of online guides that walk you through the setup on Windows and macOS step by step.
3. Connect
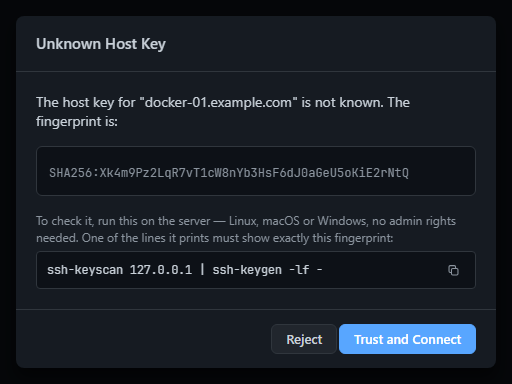
Click Connect. On the very first connection MLC Terminal shows the host's key fingerprint — confirm it with Trust and connect to trust the server. To be sure it is really your server, run the command shown below the fingerprint on that server (the copy button puts it on the clipboard); one of the lines it prints must show exactly the same fingerprint. It works on Linux, macOS and Windows and needs no admin rights.
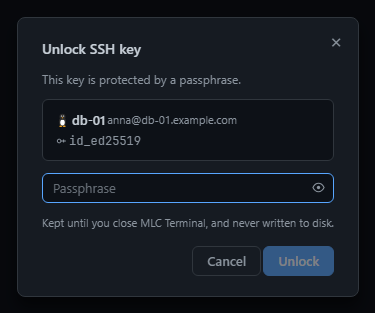
If your key is protected by a passphrase, you'll be asked for it here — once, for as long as the app stays open. It is checked against the key straight away, so a typo is caught in the dialog instead of turning into a confusing connection error. Nothing is written to disk: close MLC Terminal and it is forgotten, the same bargain ssh-agent makes.
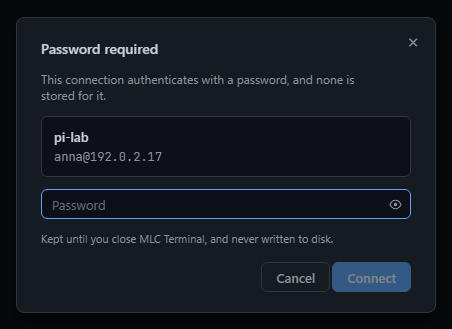
Logging in with a password and none is stored? Then MLC Terminal asks for it at the same point, on the same terms: kept until you close the app, and never written to disk.
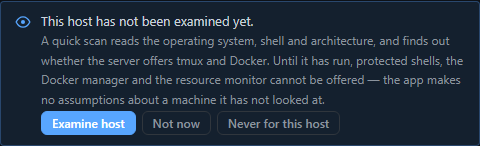
The first time, the host has not been examined yet. A quick scan reads its operating system, shell and architecture and checks whether tmux and Docker are available. Until it has run, MLC Terminal does not offer protected shells, the Docker manager or the monitor — it makes no assumptions about a machine it has not looked at. Click Examine host; it takes a few seconds, and the result is kept.
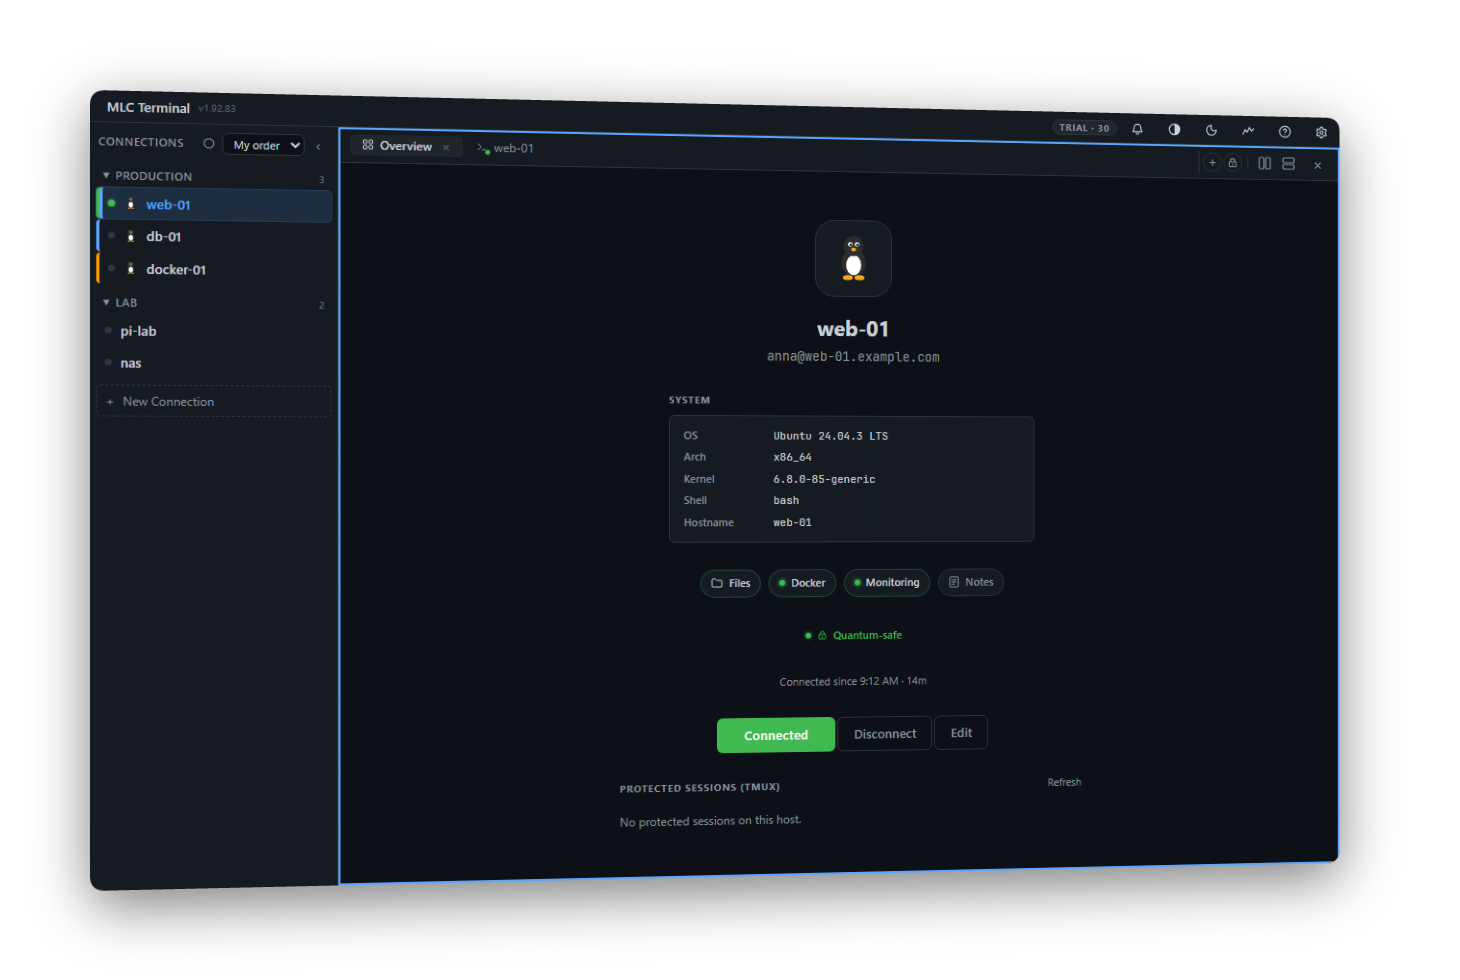
Then you land on the host's Overview, with one click to a shell, files, monitoring, or Docker.
4. Go passwordless — recommended
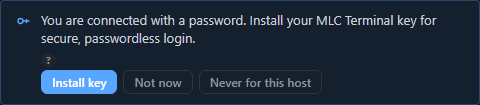
Logged in with a password? MLC Terminal offers to install its own key on the host. One click writes it to authorized_keys for you — the next connection is keyless, and your saved password stays encrypted locally until you delete it.
5. Make it yours
Open Settings to set things up the way you like:
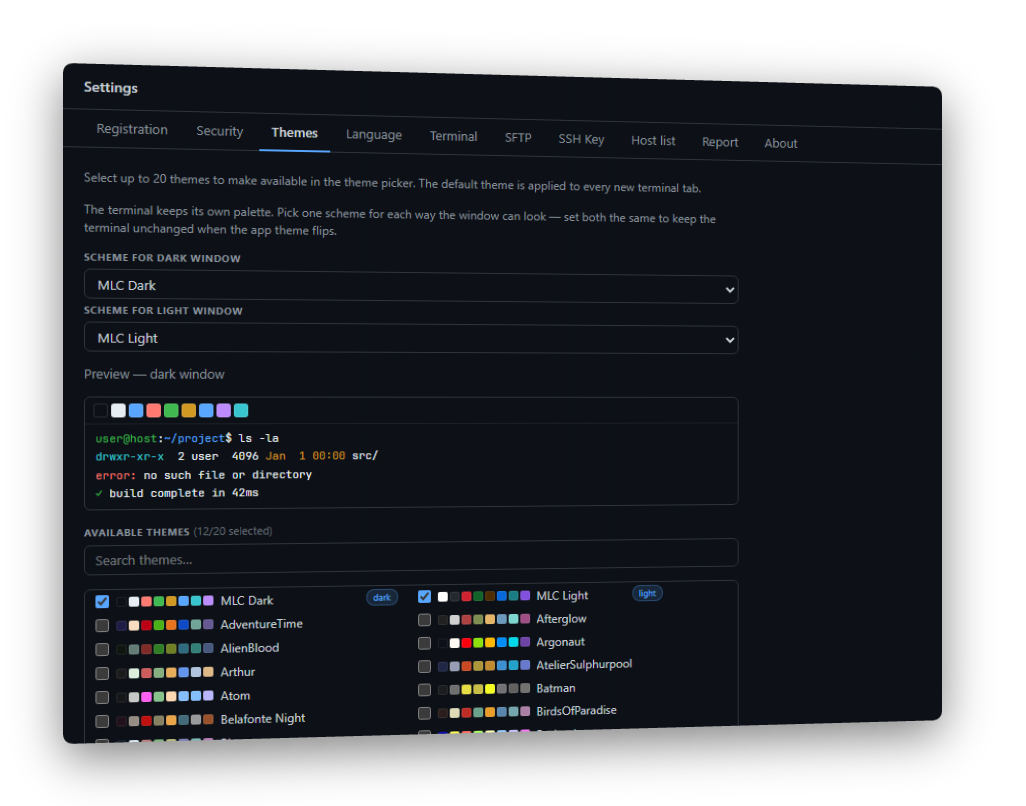
- Designs — pick from 150+ terminal themes, with a live preview. Choose a default and up to 20 for the per-tab picker.
- Sprache / Language — English, German, French, Spanish, Portuguese, or Bavarian.
- Terminal — font size, cursor, scrollback.
6. Go further
All your servers at a glance
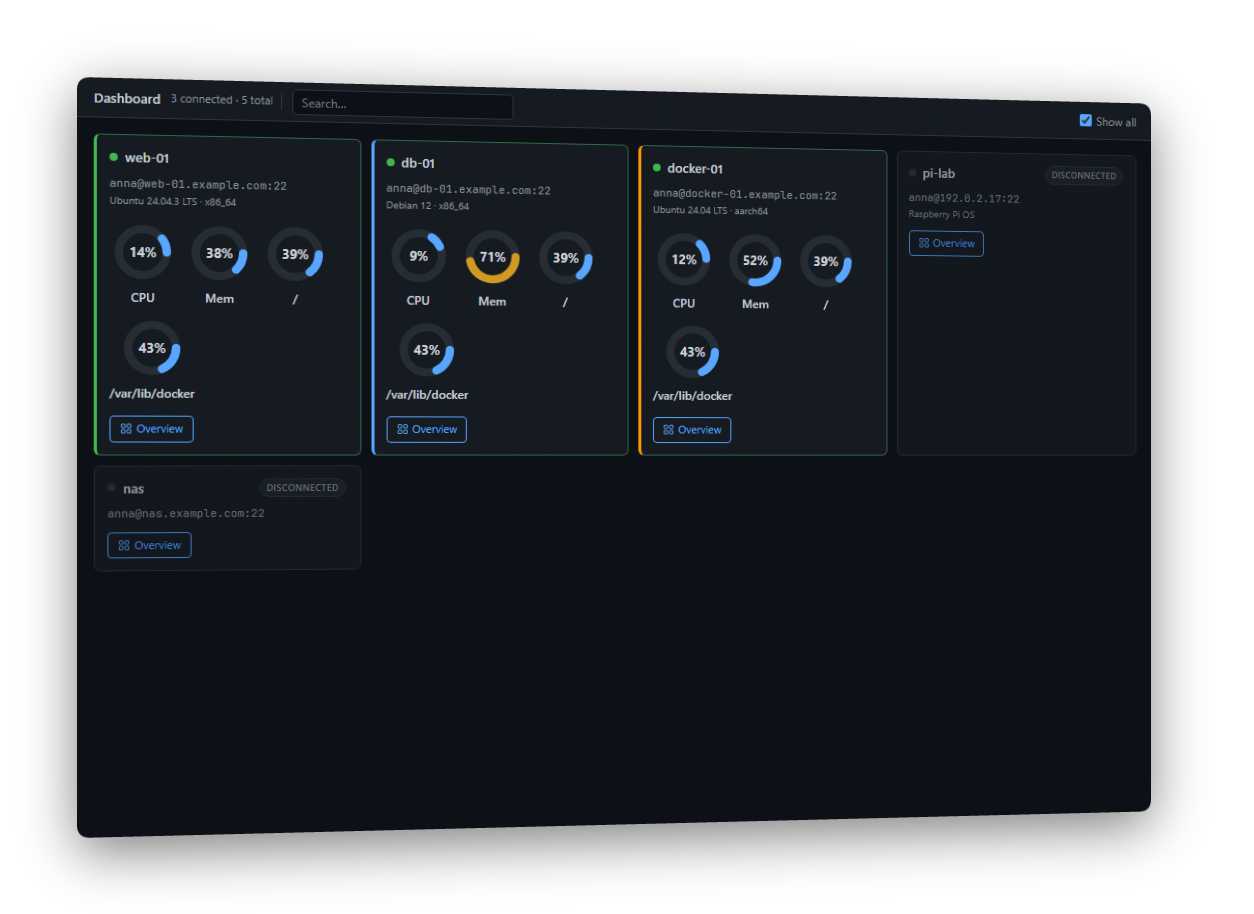
Once you've added several hosts, the Dashboard shows them all on one page — status, OS, and (when monitoring is on) live CPU, memory, and disk gauges per card. Colour tags mark environments (production, staging, homelab), and failed connections light up red.
Files (SFTP)
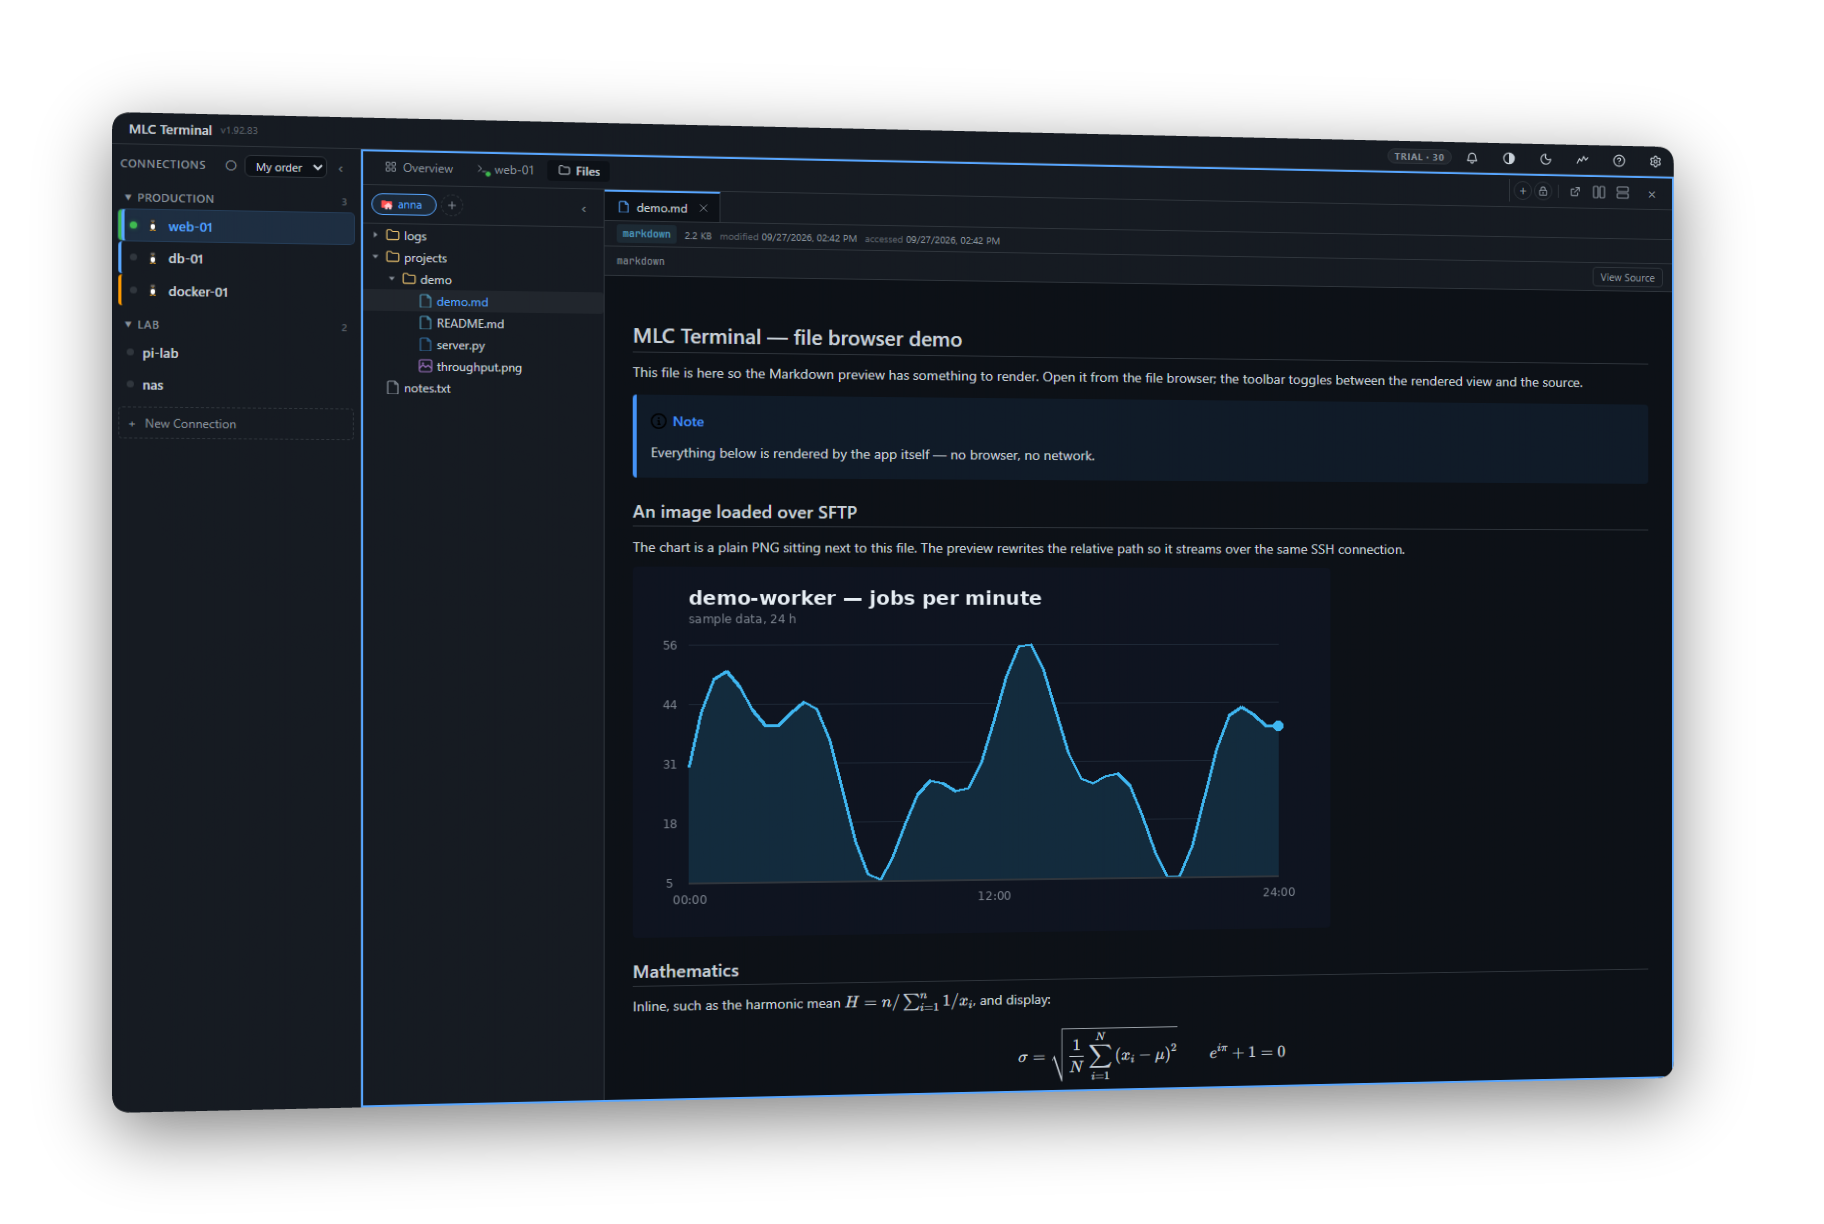
Open the Files tab to browse the remote filesystem: drag & drop upload/download, inline preview for images, PDFs, Markdown (with syntax-highlighted code and diagrams), and a hex view for binaries. Right-click an open preview tab to copy the file's path, name or directory, or to jump to it in the tree.
Click a file path
A path in your terminal output is a link: Ctrl+click (Cmd on macOS) opens it in the file viewer, bringing the Files pane up if it isn't already. That covers compiler errors with :line:col, grep -rn hits, absolute, relative and ~/ paths — and file:// hyperlinks as emitted by ls --hyperlink, eza or rg. Those open the file on the remote machine, not a same-named one on your own disk.
Prefer a plain click? Settings → Terminal → Link Activation.
Live monitoring
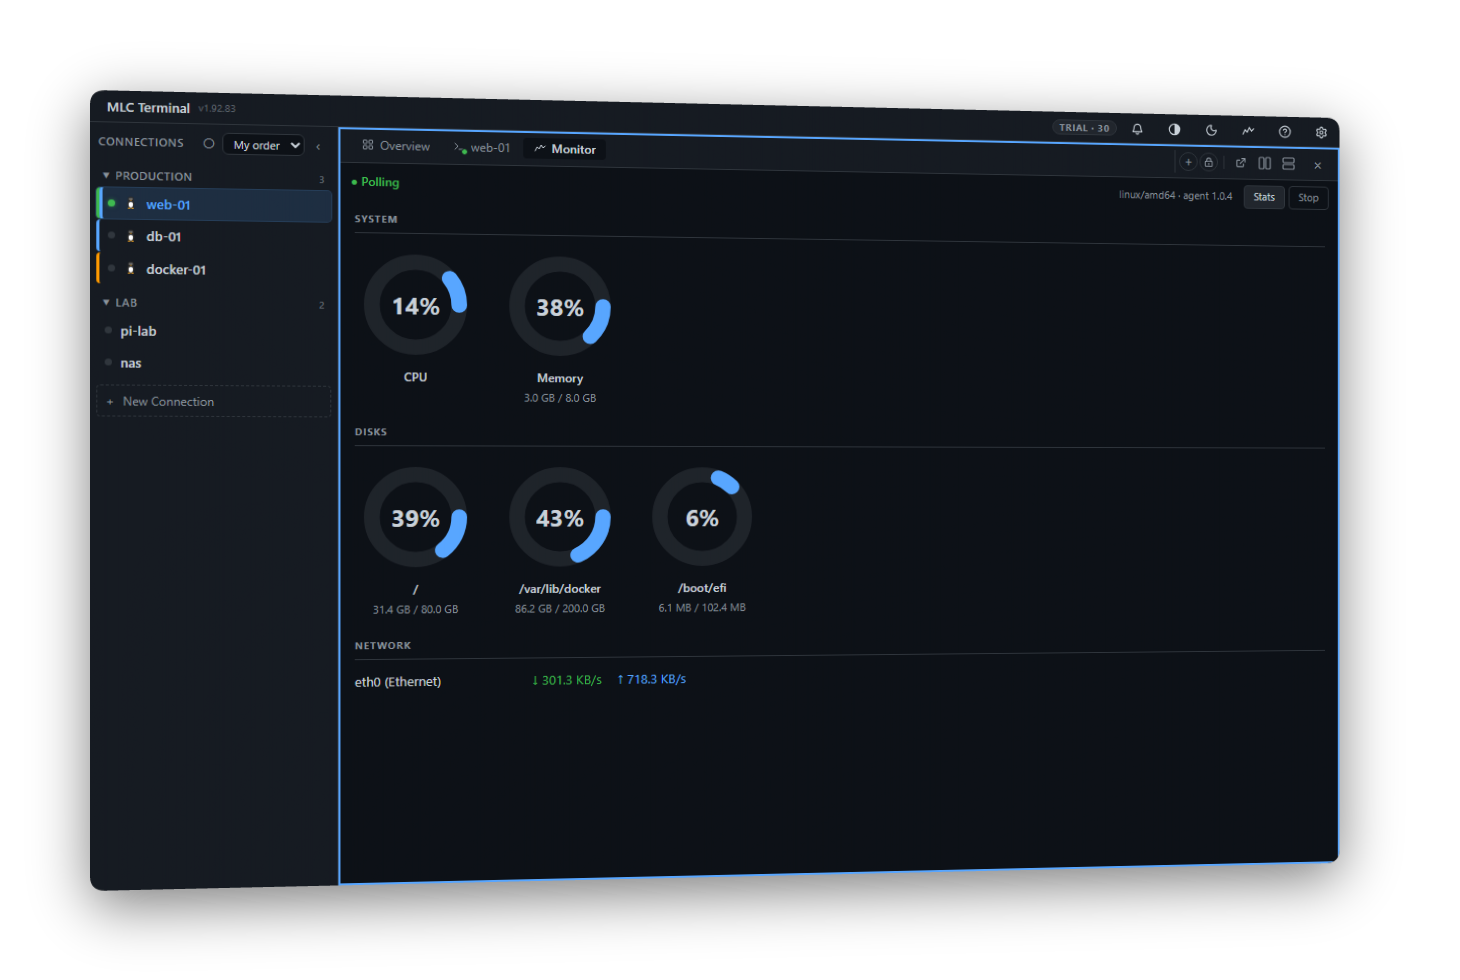
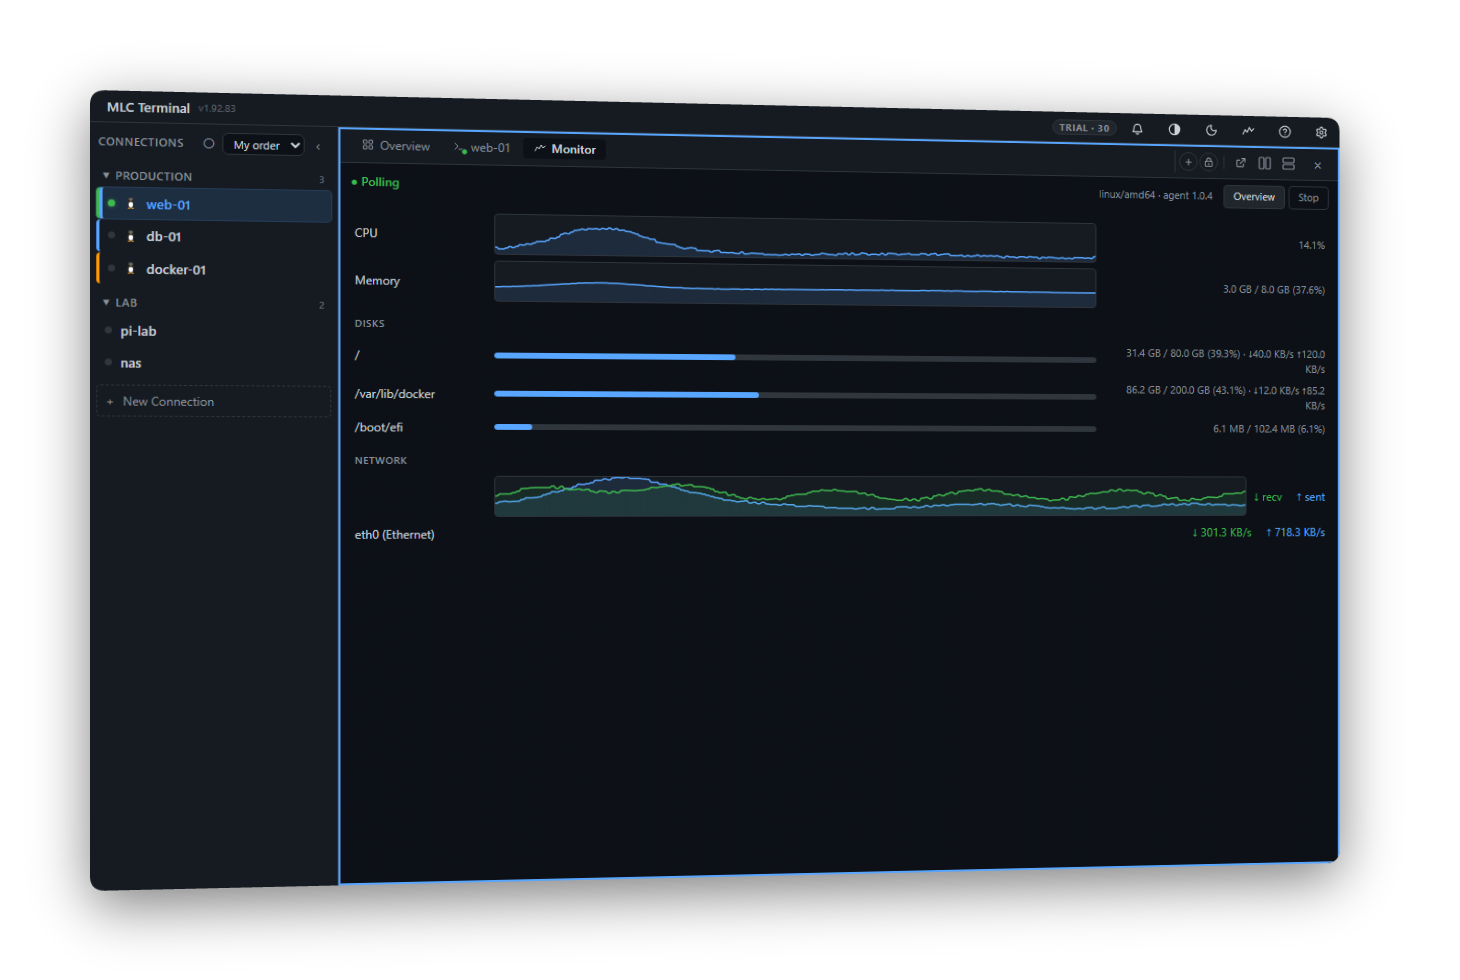
Enable monitoring per host (Settings → Features), then open the Monitor tab for live CPU, memory, disk, and network gauges with their recent history. A small helper is copied to the server automatically and runs only for a moment per reading — no service, nothing running in the background.
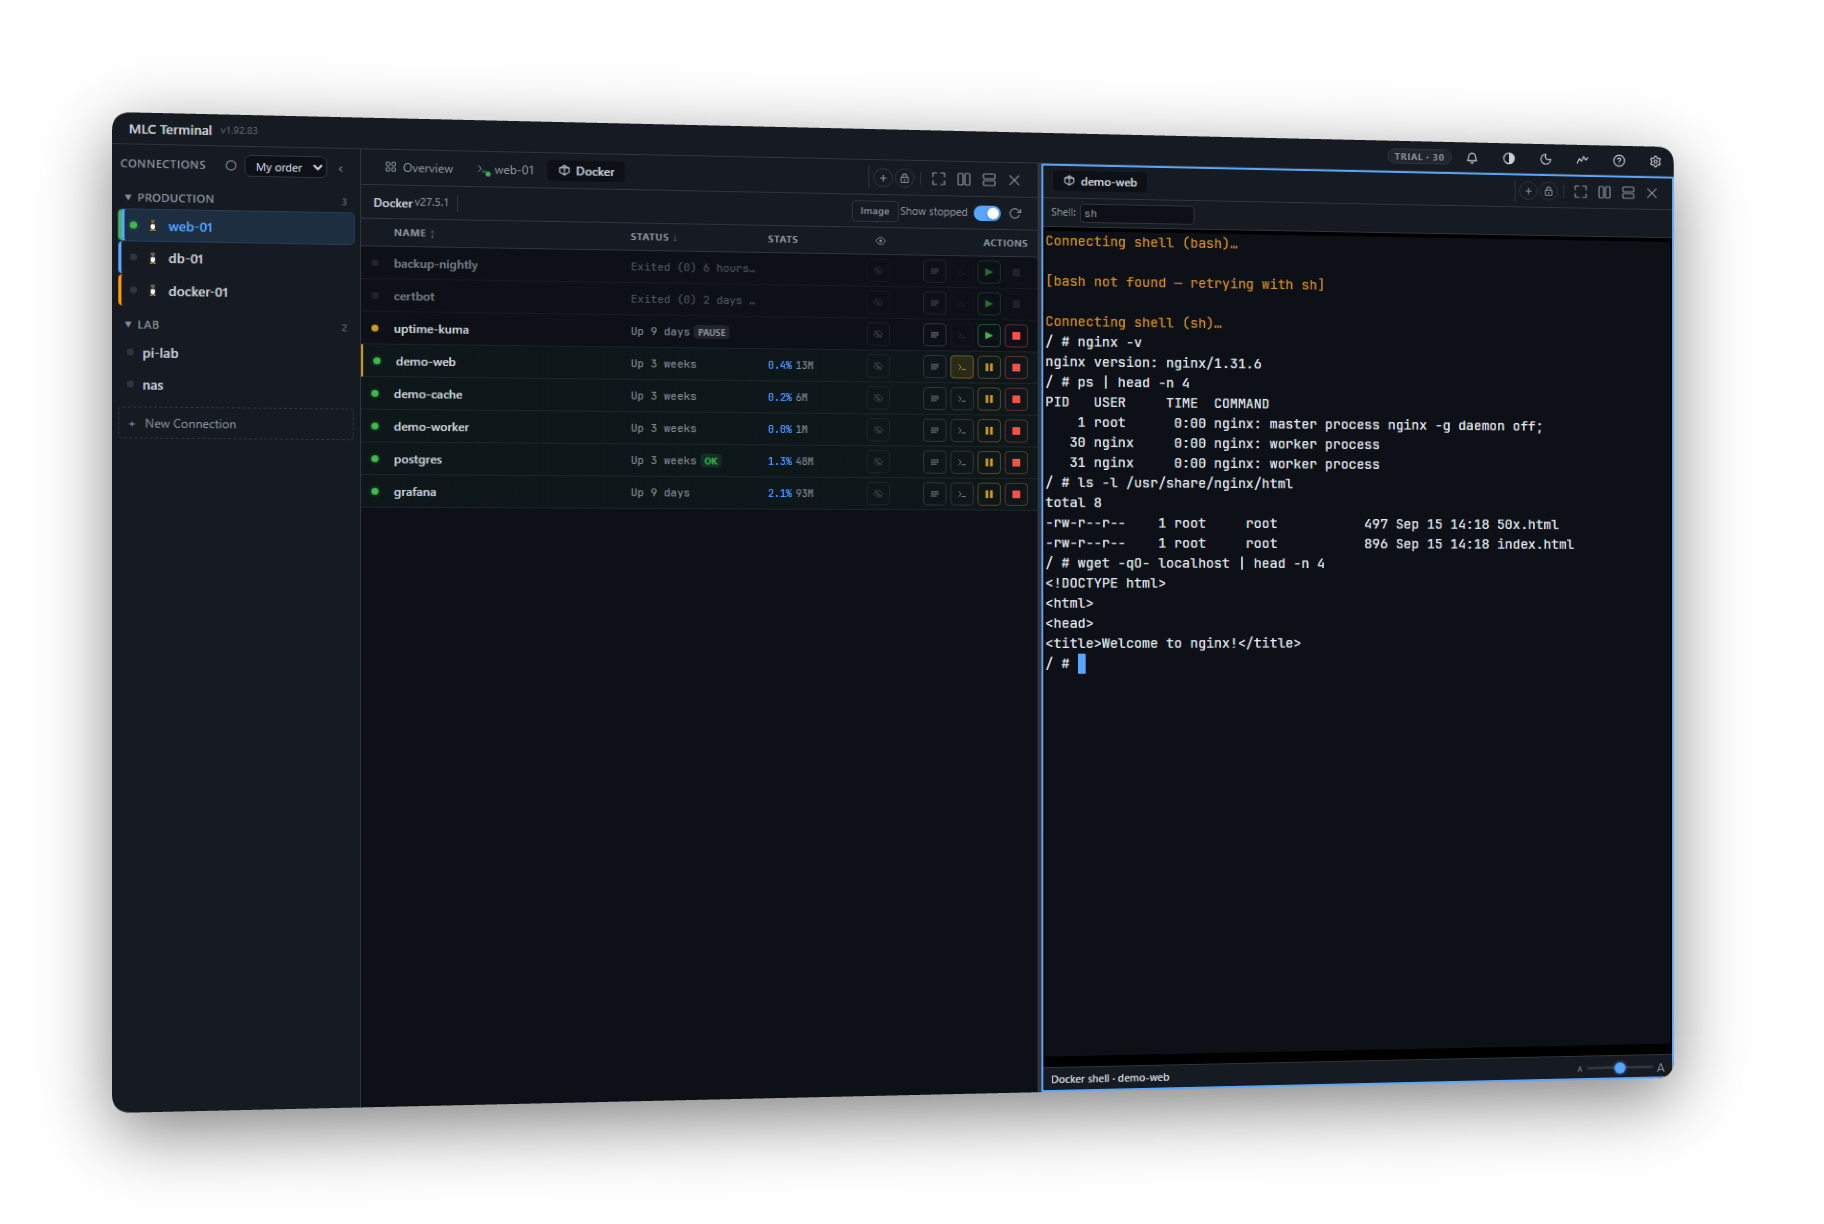
Docker
The Docker tab lists every container with status, image, uptime, and ports. Start, stop, pause, tail logs live, or open a shell inside any container — without leaving the app.
No docker command-line program has to be installed on the far end: MLC Terminal speaks the Docker API over its socket directly. It looks in the usual places — the system socket, a rootless daemon's (/run/user/<uid>/docker.sock) and Docker Desktop's. If DOCKER_HOST is set, that wins.
If your user may not use the socket — on Linux that normally means the account is not in the docker group — the app says exactly that, instead of reporting "not reachable". For a daemon in an unusual place, set the socket path on the host under Features.
A Windows machine as the target does not work. Docker Desktop there offers a named pipe rather than a socket file, and SSH cannot forward to one. Connect over SSH into WSL2 instead — there is a real socket there, and the Docker tab works as on any Linux host.
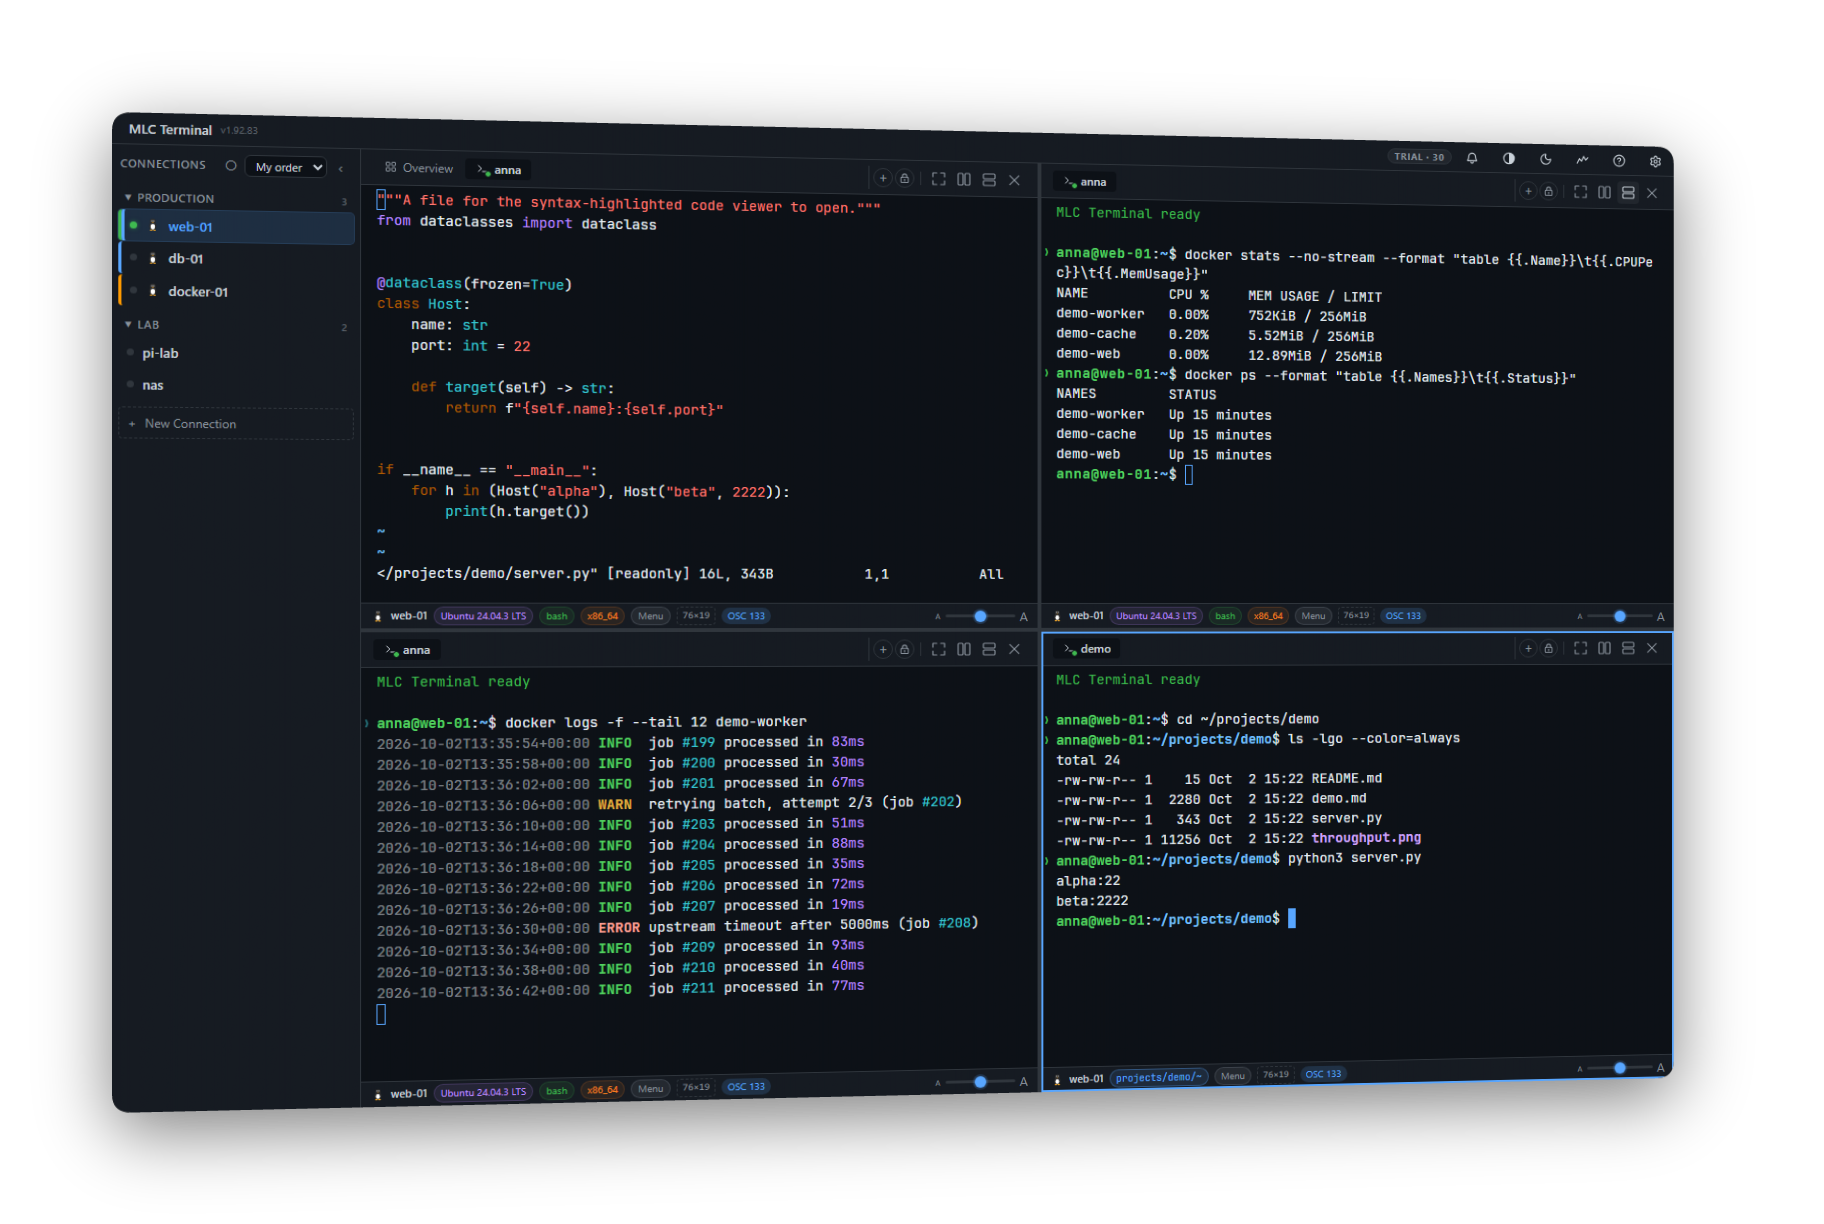
Split & multi-tab
Open as many terminals per host as you need, then drag a tab to a pane edge to split the view — shell next to files, two terminals over a monitor. Same muscle memory as a modern IDE. There is no tab limit: if the server runs out of channels on one connection, another opens quietly in the background.
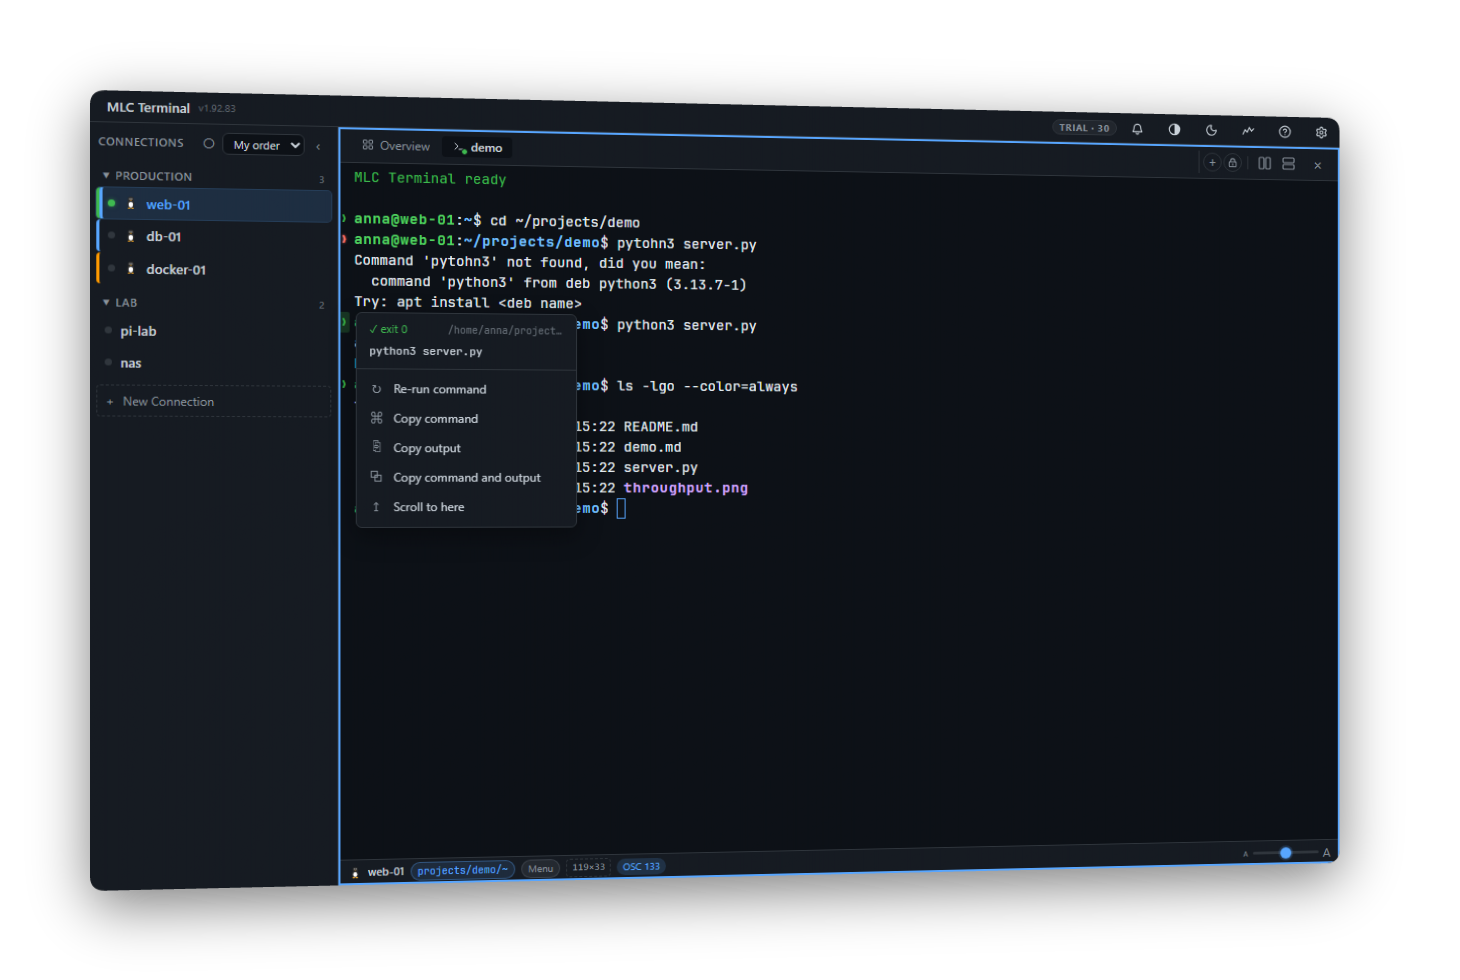
Per-command markers
Paste the shell-integration snippet (one line, idempotent) into your ~/.bashrc or ~/.zshrc and every command gets a green/red marker in the gutter — click it to re-run, copy the command, or copy its output. The footer also tracks your live working directory.
And that's not all
This tour covers the basics — MLC Terminal does more that isn't shown here:
- Drag & drop tabs and panes — drag a tab to a pane edge to split, rebuild your layout freely (the killer feature for multi-pane work)
- Desktop notifications straight from your scripts
- Inline images in the terminal via Sixel and the iTerm2 protocol
- Per-terminal zoom — scale individual panes up or down
- Auto-reconnect and automatic session restore on relaunch
- … and much more
A note on tiers: the first 30 days run without an account, with everything unlocked. After that MLC Terminal continues on the free tier — up to three saved hosts, without the Docker tab and live monitoring; nothing you set up is removed. Register before the end of 2026 and both are free for a year; after that they belong to a Pro licence.
That's the tour. Everything works over the SSH connection you already have — no services run on the server. The only things the app puts there are the ones you switch on: its key, the monitoring helper, the shell integration.