Clipboard Manager
Take a screenshot — the finished file is already in the folder. No switching apps, no save dialog, no filename.
The Clipboard Manager watches the system clipboard. The moment an image lands there — a screenshot, a copied crop, an image from the browser — an OpticScript script runs over it and drops the result into a folder you choose.
That sounds minor until you count how often you do it in a day.
Who this pays off for immediately
People documenting software. Manual, wiki, release notes: thirty screenshots that all have to look the same — same width, same frame, same compression. By hand that is the same set of steps thirty times, and on the twenty-fifth one of them comes out different.
People testing software. A test session produces dozens of captures a day. Numbered, cropped and filed in the bug-report folder without interrupting the run.
People sharing images. A fixed region blacked out before the image goes anywhere — the customer name in the title bar, the licence key in a dialog.
Three examples, all of them runnable
The scripts below are complete. Copy one, pick it under Script in the Clipboard Manager, done.
One screenshot, three resolutions
Every capture lands as a thumbnail, 1× and 2× at the same time —
exactly what an <img srcset> needs. The usual route there is three
manual exports, per image.
//!INPUT: INPUT
//!OUTPUT: SHOT_1X, SHOT_2X, SHOT_THUMB
//!PARAM: QUALITY:number=82

const src = Engine.loadImage(INPUT);

function scaled(width, out) {
    const c = src.clone();
    c.resize(width, Math.max(1, Math.round(width * (c.height / c.width))));
    c.save(out, { format: "webp", quality: QUALITY });
    c.free();
}

scaled(640,  SHOT_THUMB);
scaled(1280, SHOT_1X);
scaled(2560, SHOT_2X);

src.free();
QUALITY shows up as a slider in the UI — try values without touching
the script.
Wrap it in the house layout
Every screenshot in the manual gets the same margin, without anyone having to remember it.
//!INPUT: INPUT
//!OUTPUT: FRAMED
//!PARAM: PAD:number=32

const shot = Engine.loadImage(INPUT);

const page = Engine.createColoredImage(
    shot.width + PAD * 2,
    shot.height + PAD * 2,
    "#f4f4f5",
);
page.blendAt(shot, px(PAD, PAD), 1.0);
page.save(FRAMED, { format: "png" });

shot.free();
page.free();
Instead of the flat fill you can just as well load a logo, a gradient or a whole template from a file.
Redact before the image leaves the building
//!INPUT: INPUT
//!OUTPUT: SAFE
//!PARAM: X:number=0, Y:number=0, W:number=420, H:number=28

const shot = Engine.loadImage(INPUT);

const bar = Engine.createColoredImage(W, H, "#111111");
shot.blendAt(bar, px(X, Y), 1.0);
shot.save(SAFE, { format: "png" });

bar.free();
shot.free();
The region is set through the four sliders — dial it in once for your window's title bar and it sits right on every screenshot after that.
Setting it up
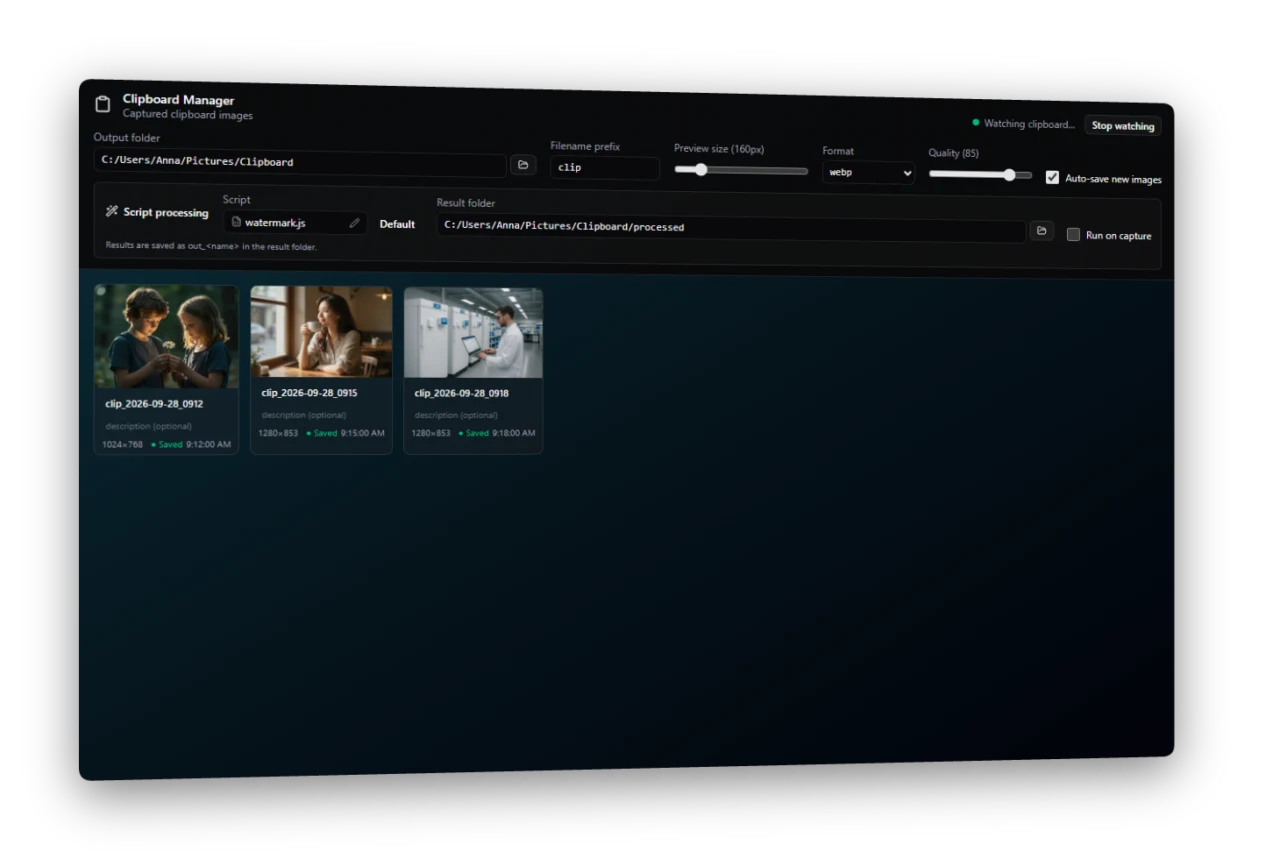
Folders and the script switch at the top, the chosen script's
//!PARAM: fields in the middle, every capture as a card at the
bottom — switchable between original and result.
- Open the Clipboard Manager — from the app's header bar.
- Pick an output folder. You can keep two: one for the raw captures (autosave), one for the results.
- Pick a script — a
.jsfile from disk, or the bundled example. - Tick "run on capture". From then on the script runs over every image that lands in the clipboard.
Without the tick the automation stays off and you can push each capture through individually with the ✨ button on its card — handy while you are still shaping the script.
Whatever you declare as //!PARAM: shows up as an input field. The
values are remembered and apply to the next run.
Unlocking
The Clipboard Manager is part of the free feature set but needs a registered installation — a free key is enough. For the first 30 days it also runs unregistered.
The same rule covers the Batch Manager: the same idea with a different trigger — a folder full of images instead of the clipboard.
See also
- First steps — install and the JS engine tour.
- API reference — every
Engine.*method. - Examples — 70+ working scripts.